Setting Up a Synology NAS
Hardware
- Synology DiskStation DS1621+ 6-Bay NAS Enclosure
- 1x WD 12TB Red Plus NAS Drive
- 1x Toshiba 12TB MG Series Enterprise Drive (MG07ACA12TE)
- 1x CyberPower CP1500PFCLCD PFC Sinewave UPS System, 1500VA/1000W, 12 Outlets, AVR, Mini Tower
General Setup
I poked through the settings myself for a while to try to turn on all of the security settings, and lock everything down as much as possible. Afterwards, I checked this guide to find anything I had missed. Some important things I remember overall:
- Enable daily quick SMART tests, with monthly extended SMART tests (spaced a day apart per drive)
- Enable monthly data scrubbing
- Enable 2FA for logging into the DSM locally
- Turn on the firewall to block everything, and then only allow a very small set of traffic through
- Turning a snapshotting schedule
- Turning on a storage analysis schedule
- Setting up email notifications
Universal Search
One thing the guide above didn’t cover is enabling Universal Search, which should (hopefully) allow indexing and better searching of the whole NAS. I’ve enabled that now, following the instructions here, and have also gone into the settings to enable additional memory to be used as a cache.
Redundancy / Backup Strategy
I have multiple tiers of backup and redundancy planned / implemented, following the 3-2-1 rule.
- 1 copy of my data across my various PCs (in total, with each PC having some different data). Most of the PCs don’t have any sort of redundant storage.
- 1 copy of my data aggregated on the NAS, which is using SHR to provide some robustness to disk failure.
- 1 copy of my data uploaded to an offsite cloud backup provider (Backblaze).
- 1 copy of my data uploaded to another Synology NAS at someone else’s place. The cloud is really just “someone else’s computer”, so this can be considered a cloud backup too!
Backblaze Backup
It seems Backblaze is relatively cheap compared to other cloud storage options, with cheap egress as well. I opted to just back up my entire NAS to Backblaze, since I don’t actually have that much data, and it can be backed up as compressed data too. Plus, the first 10GB are free! There’s a guide here that goes into detail on how to do the setup. Turns out it’s pretty straightforward now that Backblaze has an S3-compatible API.
Other Synology NAS Backup
TODO, but eventually I’ll use HyperBackup to also make a copy of my NAS data at someone else’s place, in case I decide I want to stop paying Backblaze some money every month.
Aggregating Data With Syncthing
Somewhere on Reddit, I found a link to Syncthing, which seems to be a neat way to continually synchronize files between two separate devices. I’m trying out using it to sync my home directory on various machines (e.g. multiple laptops, desktops, etc) with a copy on my NAS, in a /HomeStuff shared folder. The folder looks something like this:
|
|
This way, I can maintain a local home directory on each of my machines, and then have it backed up continuously to my NAS. The other backup software running on the NAS can then make sure this data gets replicated further, and synchronized to e.g. cloud storage / offsite backups. This even works across the internet, though I’ve turned that feature off.
NAS Docker Setup
- On the NAS, install the Docker package, and then open it.
- Install the Syncthing package from Linuxserver.io (this one), rather than the official one
syncthing/syncthing, since thelinuxserverone gives you the ability to set UID / GID easily with environment variables. - Click Create, and then select the
linuxserver/syncthing:latestimage. - Network - leave these settings alone (defaults to bridge).
- General Settings - enable auto-restart, leave the rest alone (off by default). Then, click on Advanced Settings, and set the following. This makes the synced files get created as not-root.
PGID->1000PUID->1000
- Port Settings - in Local Port, use the same port as the Container Port, rather than using Auto. In other words, Local Port 21027 for Container Port 21027, etc.
- Volume Settings - Click on Add Folder, then add the following mappings:
/HomeStuff->/sync/NasStuff/Syncthing->/config
- Summary - check that everything looks good, then hit Done. This will run the container by default.
- Add the following firewall exceptions:
- Allow ports
8384,22000for TCP - Allow ports
21027,22000for UDP
- Allow ports
- Fire up a terminal into the docker container that’s now running, and navigate to
/sync. Usels -lahto check that/synchas sufficient permissions to allow the1000:1000user to manipulate the directory - this should just be777. Usechmod a+rwx /syncif not. This didn’t seem to be necessary for the/configfolder for me.
PC (Local / Client) GUI Setup
Windows
- Grab the SyncTrayzorSetup-x64.exe download from the releases page. This is a wrapper around Syncthing which adds auto-start and a nice tray icon for Windows. Install SyncTrayzor, and launch Syncthing.
- Add your home directory (e.g.
C:/Users/vasu) as a folder within Syncthing, and delete the default folder. Give it a name that describes your machine somehow (hostname is a decent idea). - Click into the new folder you just added, and add any ignore patterns you want. For me, on Windows, that’s
/AppData. - Let it scan for a while and find all of the files in your newly added folder.
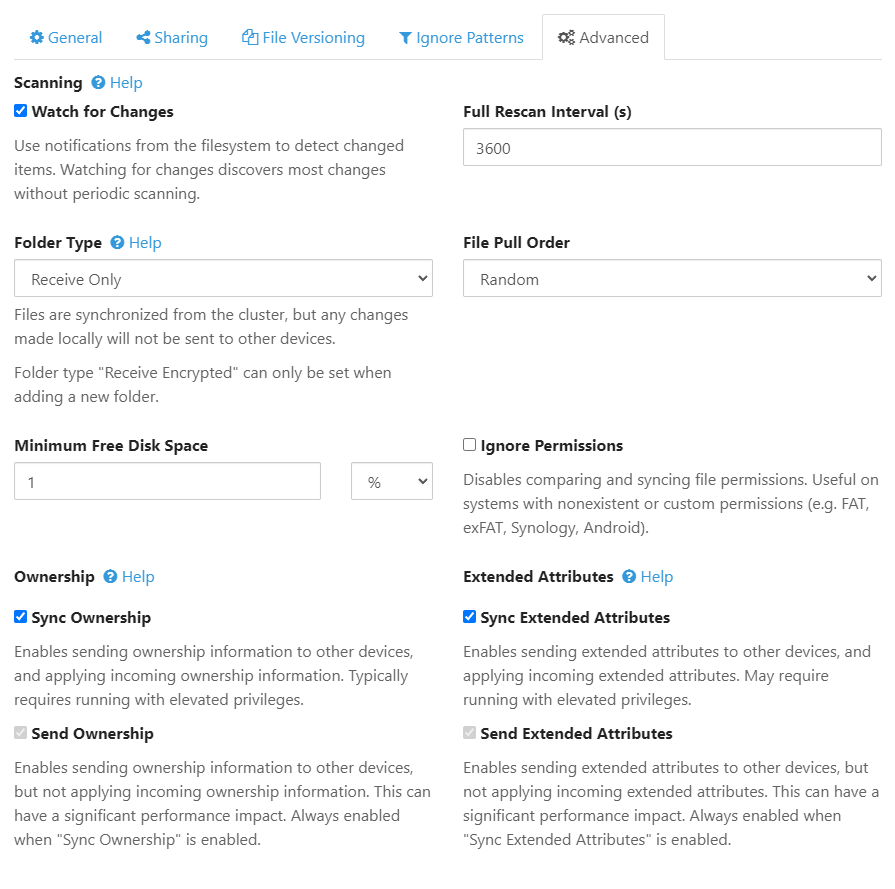
- Configure the folder on your PC (under Advanced) to be a Send Only folder, and tick the Send Ownership and Send Extended Attributes options (see picture below). This ensures that we’re only syncing to the NAS one way, and not accidentally deleting everything on the PC if the NAS goes up in flames. There’s more details on that idea here.
- Afterward, click the Add Remote Device button on the bottom right, and follow the instructions to add the NAS as a remote device.
- After the NAS accepts, go to the home directory folder you created, and share it with the NAS.

Debian-based Linux
- Follow the instructions here to install Syncthing on your debian-based Linux system
- Add the
/usr/bin/syncthingdaemon as a startup application. For me, that’s done via a nice GUI tool in Cinnamon. Then, either reboot (or maybe just relog), andsyncthingshould be running. Alternatively, just open up a terminal and runsyncthingfor the first setup. - Navigate to
127.0.0.1:8384to get to the Syncthing GUI - Configure it as above for Windows
- Note that there’s also a bunch of other tools listed here that might add better integrations with the toolbars, but I’m not using any of them atm.
- Per the instructions here, you might need to increase the
inotifylimits. Supposedly it takes about 1 KB of memory in the kernel perinotifyinstance, so choose the limit accordingly.
|
|
NAS (Remote / Server) GUI Setup
- You should be able to log into the GUI at
<NAS IP>:8384. It’ll mention that you should set a UI password, so set that to something secure, and store it in a password manager. Also enable HTTPS for the GUI. - You should be prompted to accept the remote connection from the PC.
- You should then be prompted to accept the folder share request from the PC. Do that, making sure to change the Folder Path to
/sync/[folder_name]rather than/config/[descriptive_folder_name] - If you get errors with permissions around folder creation, ensure that you’ve changed the permissions on the
/syncfolder to777via the terminal for the docker container. If not, do that, and then restart the container. You may also need to delete and recreate the connection to the PC. - Configure the NAS folder to be Receive Only (probably not necessary, with the PC set to Send Only), with the various Sync options turned on, as per the picture below. This link also mentions using the Ignore Delete option, but the documentation marks that as highly discouraged, so I’m not going to turn it on. I have daily snapshots turned on, and they’re preserved for a while, so while it’s not quite as immediate as LTT’s setup where their deleted files are instantly replicated, it’s probably good enough for me.
- Wait a while for everything to sync.

Network Setup
Consider disabling the network relay connection, and instead only allowing sync when you’re on your local network. The below configuration forces listening only on port 22000 for any interface with IPv4 and IPv6, and only operates on the local network, with no global discovery.
I only did this on the NAS, since blocking one end of the link seems good enough.
The NAS should still be reachable once I set up a home VPN connection, which I might do as a docker container running WireGuard on the NAS itself.

Memory Upgrade
I’d like to upgrade the memory, because:
- Why not?
- My utilization seems very high (~85%) since installing the SSD cache.
- The overall system responsiveness seems to have taken a nose-dive as a result.
Options
The official RAM upgrades on the compatibility list are:
|
|
To be absolutely sure, though, we can look at the RAM already installed in the system via SSH:
|
|
Here’s a selection of compatible memory from Newegg. It seems that using 2666 MHz as a filter removes everything under 16 GB. There are 32 GB sticks available, which seems to be supported in theory (based on the specs above), but it’s probably not necessary to put that much RAM in the system, nor is it worth going outside the official supported specs (which only go up to 32 GB), so I removed it from the filter. This RAM claims to be equivalent to the 16 GB official Synology module, so I’ll probably just get this.
Purchase / Installation
After some deliberation, I ended up purchasing 2 sticks of this RAM - “Synology D4ECSO-2666-16G Equivalent 16GB DDR4 2666 ECC SODIMM Server Memory RAM”. I paid $55.79 each, before tax.
After installation, this is what I see in dmidecode:
|
|
Here’s a diff of the before / after. The tl;dr is that the only differences from the pre-installed module seem to be the capacity (4GB to 16GB), the manufacturer info, and switching from single-rank to dual-rank. Apparently, dual-rank is meant for higher capacity, but comes at the cost of higher latencies.
|
|
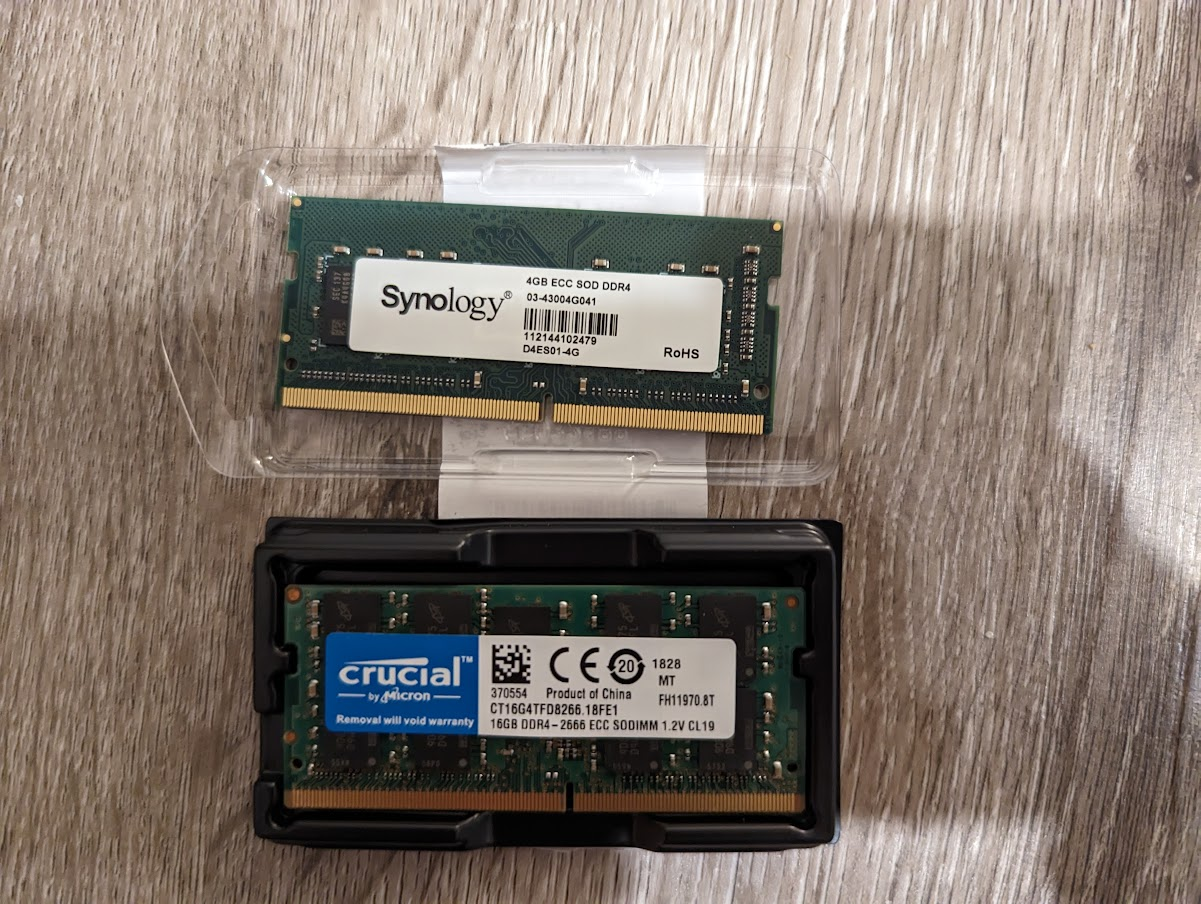
Here’s a pic of the two different RAM sticks. Top is the old stick, bottom is the new stick.

Thoughts
The overall utilization seems to be about ~2GB now (~6% of 32 GB), down from the ~3.5GB being used before (~85% of 4GB). Hopefully, the responsiveness of the system improves, as things started to get very sluggish.